1.11.2011

Nancy Drew | Legend of Crystal Skull | Part 9_Bruno's Crypt


Buzzards at Bruno's crypt:
Go to Bruno's crypt beside the garden fountain.Look down at the circle on the ground - the headstone.Look up and see the master of buzzards on the roof of the mausoleum. It has feathers on its head.

Read the 'The Key to the Statues, the Statues are Key' story in the 'Short Stories for Tired Eyes' book in inventory.
Take note of the drawing in the book of the master of buzzards. The arrangement of the feathers is seen.

The object of the puzzle is to get the master buzzards feathers similar to that of the picture.
Turn around and see 4 buzzards. Clicking on each one produces a change in the master buzzard's feathers.
Check the changes made by the 4 buzzards to find out which ones to click to get the drawing.
Go to the fountain to reset the puzzle.

Take the feather key dropped by the master buzzard.
Turn around and use the feather key on the feather lock at base of each gargoyle to get eyeballs 20-23.

Search for mushrooms:
Go outside and talk to Renée. Borrow her shovel. She needs 5 painted conks. Take the bag from the table.
Take the path left of the fountain. Pick mushroom 1 from the lawn.
Go towards the cemetery gate. At the gate turn around and pick mushroom 2 from the lawn at left.
Go through the cemetery gate, take the right path from the fountain, go forward until the end and go through to the swamp at right. Take mushroom 3 at end of the log. Eeek! Meet Bernie the alligator.
Go back to the cemetery and take bottom path pass the fountain until the end. Take mushroom 4 by the wall.
Go back to the fountain. Go to top path pass the writhing tree and then left from the Bolet Mausoleum. Go through the archway. Take mushroom 5 from the overlook.
Turn around, forward, right and forward back to the house.
Give Renée the mushroom. Talk about Bernie and learn that it is trained to jump out to catch marshmallows when the log is touched. Take the shovel hanging on the wall at right.


Charlie Wicker:
Read the 'Steps in the Right Direction' story in the 'Short Stories for Tired Eyes' book in inventory.
Go back to the book at the great room and search for a Charlie Wicker.
Turn to page 82 and see the name Charlie Wicker at Sleeping Meadows.
Find Sleeping Meadows in the miniature cemetery. Go to Sleeping Meadows.
Look at the letters under Charlie Wicker's Name. Use blank paper to get a tracing of the directions.
Enter at right to the forest. See an overhead view of the area.
Using the directions on the tracing, click on the compass central button to move the spade.
Once a direction is reached, count the fingers of the skeleton to know how many times to move to that direction. Just follow the first number that the skeleton hand show.
Move by pressing the move button to west 4 times, change the compass by clicking on the cardinal direction to the next direction, see the hand raise 2 fingers; move to that direction twice and so on...
W-4, N-2, E-1, S-3, W-2, N-2, W-3, S-3, E-1, N-2, E-1, N-3, E-4, S-5, W-2.
Use the shovel on the ground. Use the shovel to open the canister. Take eyeball 19 and the shovel handle-skeleton arm.

Nancy Drew | Legend of Crystal Skull | Part 8_Clock Puzzle


Bowling lane: Look at the bowling lane machine at the Secret room.
    The object of the puzzle is to get the balls to turn all the pictures into eyes.

Grandfather clock:
Go to the grandfather clock at end of the hallway.
Read the 'Time Will Tell' story in the 'Short Stories for Tired Eyes' book in inventory.
Write down the numbers-time of day found in the story. Then enter that time of the day on the clock in the correct order as read from the book.

 Part 1. The noted words and associated time in the story are:
 Midday (12), three hours have past (3), move ahead two hours more (5) and nine hours  before (8).
 Six hours before (2) and moved ahead nine (11).

 Enter 12, 3, 5, 8, 2, 11 on the clock. Press the eye button on top of the clock after selecting a  number. This enters that number. Take eyeball 10.

 Part 2. The noted words and associated time in the story are:
 High noon (12), Five hours ago (7), gone in three (10).
 Would be 5 hours (3), two hours from now, (2), an hour later (1).

 Enter 12, 7, 10, 3, 2, 1. Press the eye button on top of the clock after selecting a number.  This enters that number. Take eyeball 11.

 Part 3. The noted words and associated time in the story are:
 Midnight (12), fours hours before (8), mere two hours (10), six hours after (4), usual five  hours (9), two hours later (11).

 Enter 12, 8, 10, 4, 9, 11. Press the eye button on top of the clock after selecting a number.  This enters that number. Take eyeball 12.


Bruno's Key chain:
Talk to Henry and ask for Bruno's eyeball keychain. Nancy ends up mentioning Zeke's box and Summer. Take eyeball 15 (cabinet slot 7). Talk to Henry again.

The History of Quincy T. Booker's Teeth:
Read the 'The History of Quincy T. Booker's Teeth' story in the 'Short Stories for Tired Eyes' book in inventory.
Go to the bookcase at the corner left of the fireplace. See the books that have tooth on the binding.
 The bottom books are 5 each side. The top books are 8 books on each side.
 The bottom books represent baby teeth while the top books represent the adult teeth.
 The object of the puzzle is to click on the books in the order based on Booker's Teeth history.
 Use the dental chart in the secret room as reference.

The arrangement of the teeth in the dental chart is:

 Baby teeth (from center to the back) - central incisor, lateral incisor, canine, first molar and second molar.
 Adult teeth (from center to the back) - central incisor, lateral incisor, canine, first bicuspid, second bicuspid, first molar, second molar and third molar.
 The baby teeth mentioned in the history: upper right second molar, upper right central incisor, lower left lateral incisor and lower right canine.
 The adult permanent teeth mentioned in the history: lower right canine, upper left first bicuspid, lower left canine and lower left 3rd molar.

When looking for the book based on the chart and history, remember that you are looking at the mouth. So, the left side of the bookcase is the patient's right side and the right side of the bookcase is the patient's left side.

Baby teeth: Look close at the lower bookcase with teeth bookends.

Click on 5th from center on top left side, first book from center on top left side, first book from center top right side and second book from center on bottom right side. Automatically pull back.


Adult teeth: Look close at the upper bookcase.

Click on third book from center at bottom left, 4th book from center at top right side, third book from center at bottom right and 8th book from center at bottom right side.
Take eyeball 16.

A Librarian's Tale:

Read the 'A Librarian's Tale' story in the 'Short Stories for Tired Eyes' book in inventory.
The clue states 'at the cards that keep track of every book'. Go to the bookcase left of Henry.
Open the library card catalogue. The next clue states: '...get such an eye'. Another clue states: 'the title's the thing, addition's the hook'.
Go through the different book title in the card catalogue. Note any title that has an eye on it and write down the number associated with it. Then add the numbers.

My Eye and Other Tall Tales (401), The Camel in the Needle's Eye (608), Cat's Eye (010), Eye Candy (004), Grinding Fake Eyes (511), Turn a Blind Eye (006). The total is 1540.
Look up and take the book at right on the top shelf - A Librarian's Tale.

It has lock on the cover. Enter 1540 on the lock. Take eyeball 14.


Fountain and spider web notes:
 Go to the fountain and look at the drain hole again.

Remember the spider in the box in the secret room. It played a note whenever the handle is turned before the spider pops up.
Pluck the strings of the spider web in the order the notes were played in the pop up box.
Click on C, C, C, D, E, E, E, D, C, D, E and C.


Take eyeball 17.


Nancy Drew | Legend of Crystal Skull | Part 7_Secret Passage


Portraits: Go to the Great room and to the portraits.
Study the portraits. Note that all the portraits carry a unique item and note that the arrangement of the frames is similar to the piece of paper found in Hotchkiss' book.

Using the letters in the paper, arrange the portraits:
Top row (left to right): T(oothpaste), B(anana), F(an), M(onkey).
Bottom row (left to right): L(ollipop), H(at), A(xe), P(oodle), U(mbrella).


A secret door opens.


Secret passage:
Enter and hear Henry talk to his girlfriend Summer.
Look through the peephole looking in the library. The peephole is pointed at the bookcase at corner of the library. Use the switch at right to zoom in. It's a book titled 'The Eye of the Beholder'.
Pull back and turn right. Go up the stairs and see a spider web lock. That really looks familiar.

Spider web lock - Note that each line surrounding the spider web has broken lines.
Take note of the number of lines.


Dry fountain in the garden - Go to the garden and look at the drain hole.
Click on each line in the order shown by the clue on the secret passage's door lock.


See a small platform rise up. Take the key.
Go back to the secret passage left of the fireplace at the great room.
Use the key on the door lock at top of the stairs.

Secret Room: See that this is Bruno's secret room. Look around.
The Eyeballs cabinet: Turn left and open the cabinet with ship and octopus door. It's where the eyeballs are kept. There are 25 slots. Take the eyeball 5 (cabinet slot 17) already there. So, we need to collect 25 eyeballs.

Pirate dummy: Pan right and look close at the pirate dummy. Press a button and then press the talk button on the left side. Hear the dummy repeat that syllable. It has a nice blue eye.


Iggy:
Look above the dummy and see an open vent. This must be where Iggy hides his stash.
Look and open the small cabinet right of the dummy. See small costumes. This must be Iggy's wardrobe.

Dental chart: Look above the desk and see the chart that identifies the baby teeth and adult teeth. Take note of the location of the teeth.

Bruno's desk:
Pan right and look at the items on Bruno's desk.

Calendar book - Open the book on the left. See that once a month a day is marked with skull and crossbones. The notes have a word and a location.
May 31st, that's today. Scuttled Bones and Rampart and Dumaine are written on the right page. Aha!

Short Stories for Tired Eyes - It is a book written by Bruno Bolet. It is dedicated to those who hear the whisper. This book has tons of clues.

Invitation - In 1952, Bruno was invited to join the Jolly Roger krewe.
Picture - See a picture of the Jolly Roger krewe. They are wearing skeleton costumes. Read the inscription on the frame.

Pendulum:
Check the pendulum on the top shelf. The right one is an eye.
Press the lever and immediately try to grab the eye when it goes out of the glass cover.
There are only 2 chances to grab the eyeball. Press the button to stop the swing. Take eyeball 7 (cabinet slot 15).

Yellow Spider in the Box: Turn to the other side of the room.
Turn the handle of the yellow Spider in the Box left of the door until the spider pops out.
Write down the notes that it plays whenever the handle is turned.

Gumball machine: There's a gumball machine on the left. Press the button and chew a gumball.


Nancy Drew | Legend of Crystal Skull | Part 6_Dr. Buford


Play as Bess: See Dr. Buford sitting across the road. Go down and talk to Dr. Buford. Learn about the situation he found Bruno and the letter that Bruno must have been reading and holding. Iggy must have taken it. Bruno trained Iggy to retrieve things it has stolen. Gilbert also mentions what he thinks about hoodoo.

Call Nancy.


Play as Nancy: Let's check on clues we found already.

Nancy Drew | Legend of Crystal Skull | Part 5_Prof. Hotchkiss

Play as Nancy: Go to the library, go forward and look close at the book case with the iguana.
Iggy: Look close at the iguana. Click on the book in the box and see that the iguana is alive. Henry says that Iggy likes to steal papers.

Books - Arrange the books that Iggy dropped. Look close and arrange all the books to fill inside the box.


The Crystal Skulls:
Fact or Fable: Read the blue book at right by Beatrice Hotchkiss. See her phone number on the title page. Take the paper with letters and dots inside the book. Learn about the history of the Whisperer.

Henry:
Talk to Henry. Learn that Bruno died of myocardial infarction. He shows the death certificate. The signing physician was Bruno's best friend - Gilbert Buford. Note the eyeball key chain. It was Bruno's.

Renée:
Go outside and talk to Renée. She doesn't know about the crystal skull. Learn how Bruno died.

Phone calls:
* Call Prof. Hotchkiss. Talk to her completely and learn what Bruno said about where the Whisperer is right now - 'The ayes have it.'

* Dr. Gilbert Buford - Call Dr. Buford. The answering service answers. Learn that Dr. Buford is at his favorite gumbo stand at corner of Rampart and Dumaine.

Nancy Drew | Legend of Crystal Skull | Part 4_Zeke's shop


Play as Bess:
See a Gumbo mobile shop, a man across the street and Zeke's across the hotel balcony.

Zeke's: 
Go across and enter Zeke's. Look around at the Curio shop.
Talk to Lamont completely.
Learn that the receipt is for a large box of assorted items bought from Henry Bolet. The box is in the back room.
Look around. Go to the cabinet right of the door. Check the 5 bottles: crying powder, giggling powder, itching powder, stinking powder and sneezing powder. Bess automatically takes the sneezing powder after talking to Lamont.

Rube Goldberg contraption puzzle:

Top shelf (left to right): Bowling ball on top of stand, accordion and sneezing powder. Chattering teeth on top shelf over the balloon.
Lower shelf (left to right): Electric fan by outlet and sail boat immediately beside fan
Left pan under Zeke's sign: Shrunken head.
Top of piano (left to right): Large book, several books, hula dancer and phonograph.
Test the set up by standing on the scale. Bess should say - 'that will do it'.


Box:
Go to the back room while Lamont is sneezing like crazy. Click on the box.
See a picture of a young boy and dog. There a label of Bruno and... There's another picture of an iguana wearing a pirate costume complete with a hat. There is a skeleton costume with hat.
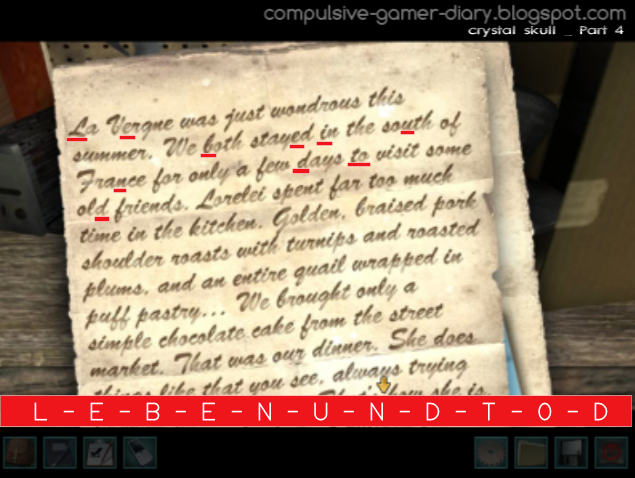
Open the box: Look at the letters on top of the wood box. Read the French vacation letter and the note with Hamlet and numbers.


Inside the box, read the letter about the Whisperer.
Bess automatically calls Nancy and gives her findings.

Nancy Drew | Legend of Crystal Skull | Part 3_Renée's Chest


Renée's room:
 - Chest puzzle - There are 18 buttons around a blue circle. There are glyphs on the side.
When a button is pressed, a pattern is seen on the central circle.


The chest opens. Read the hoodoo book.

Hoodoo signs on the wall:
Using the hoodoo book, find the syllable that corresponds to each glyph on the wall.
From left to right: Bah, zah, loo, pah, dee, moo, kah.


Go down and give Renée the chocolate. Talk to her completely and learn that wall writings are Hoodoo writings done by her. There is a spirit on the wall that made strange syllables.

Bolet Mausoleum: Go back to the Bolet Mausoleum. Use a paper on each of the 4 frames etched on the walls and columns. Automatically, use the coal to get 4 tracings. Go back to the great room of the house.

Great room: Go to the miniature cemetery. Move the screen to the top left. Look close at the roof of the mausoleum.

- Frame puzzle on mausoleum - The object of the puzzle is to enter the correct picture in each frame.
There are arrows on the side of the frame to cycle the picture.
Use the tracing from the Bolet Mausoleum as the clue. Take note that each frame is different from the others.

Mausoleum: Go back to the Bolet Mausoleum.
See Henry crying in front of the mausoleum. How sad.
Use the gold key on the door.
Enter and look at the headstone of Henry's parents at left: Marianne and Claude.
Pick up the rolled paper- portrait of Henry's parents at top of the steps at bottom right.

Great Room: Go back to the house and the great room.
Portraits: Place the portrait of Henry's parent on the empty frame.
Phone calls: Let's do some phone calls. Call the Cab Company and then Ned. Call Bess at the hotel.

Nancy Drew | Legend of Crystal Skull | Part 2_Bolet Mausoleum


Library:
Talk to Henry completely. The empty frame had the portraits of Henry's parents. Learn about the miniature cemetery in the Great Room and the one Bruno oversaw next door.

Potting area:
Exit the door to be outside. Go left and talk to Renée potting some plants. Learn the partition of Bruno's will. She also saw the skeleton man. Look at a shovel with skeleton arm hanging on right wall; right of the first lantern.

Garden:
Look around the garden.

Cemetery: 
Go through the gate. Go forward to the other side of the fountain. Go forward to the other side of the writhing tree.

Bolet Mausoleum: 
See the lit Bolet Mausoleum. Look at the framed etching at the base of the wall and columns: 2 on this side and 2 on the left side. These are similar to the one seen in the roof of the miniature. We need to copy that.

Go back to Renée and talk to her. After asking Renée for paper, she gives her room key. Enter the house and then to the hallway. Climb the stairs.

Empty room: 
Enter the room at the landing. It's an empty sad room. Open the drawer and take eyeball 4 (cabinet slot 19). Exit the room.

Renée's room:
Climb the next flight of stairs. Use the key on the door.
Open the top drawer left of the bed. Take papers.
Open the bottom cabinet. Take a Koko Kringle for you and one for her.
Check the chest with a blue circle and symbols on the cover at other side of the room.
Look around the room. See a work table with hiccup powder on the left. Look close at the glyphs on the wall.

Nancy Drew | Legend of Crystal Skull | Part_1 Marble puzzle

Bruno Bolet was the proud owner of the "Whisperer," a crystal skull rumored to protect its holder from almost any cause of death - except murder. When Bruno passed away, his nephew Henry came to wrap up his affairs, but he couldn't find the skull among the clutter of the creepy Bolet manor. You'll need to team up with Nancy's best friend Bess Marvin to find this mystical artifact before it falls into the wrong hands!


Nancy finds the door to the Bolet's house open. See footprints on the floor. In the great room, Nancy sees a costumed skeleton man. The lights go out and powder is thrown at Nancy. Nancy wakes up and is given a concoction by Renée Amande, the former housekeeper of Bruno Bolet.
Library:
Stand up and talk to Henry Bolet at right corner of room. Henry is the executor of Bruno's estate. The place has exotic pets that have run of the place.
Look around this room and see a card catalogue of books in the middle shelf left of Henry. Check the Miniature Modelers trophy left of that book case. Open the 1991 silver trophy at lower shelf to get eyeball 1 (cabinet slot 11).
Pan left and check the books at corner left of fireplace. They can be moved and have tooth depicted on the bindings. To the left is another bookcase with an iguana on top of some books.
Pan around and exit through the double doors to the hallway.
Go forward and enter the great room.

Marble puzzle: The aim of the puzzle is to get the pusher to the eye at bottom right corner of the box. The marbles and square can be moved to block the laser beam at center of the box.
Use the keyboard arrows or the arrows in the screen to move the metal pusher around the puzzle. The reset is the square with the star at middle bottom of puzzle.

Solução do Marble Puzzle (Senior Level)


1.10.2011

Nancy Drew | Shadow at the Water's Edge | Part 17 FINAL

Miwako:    Look for Miwako. She is not around.
Rentaro:    Check the work shed. He is not there also.
Take the new recorder that he built that is on the holder. This recorder sends recordings to computers and cell phones. See an e-mail icon at top right of the recorder.
Look at the work table. Take and use the dictionary on the pink note. It is a work order for room 33 - must finish today.
Take the door-o-matic.


Room 33:    Go to room 33; the infamous room. Save game here to see 2 endings.
Enter the room. Use the door-o-matic on the door.
Immediately pick up the new recorder from the floor. Press a channel to start recording.
See the ending based on your selection on what to do with the baddie.


_______________________________________________________________________________

Part 16 -Take the sword<<<==        

Nancy Drew | Shadow at the Water's Edge | Part 16 -Take the sword - fox puzzel

Ryokan:
Go back to the ryokan. If there is any grading of assignments to be done, do so.
Secret bath:
Go to room 33 via room 39. Go down to the secret bath.
Click on the lattice and see the complete nonogram puzzle.

JUNIOR


SENIOR

Right click places an X on the unnumbered sqaures. There are already brown squares that are clues in the puzzle.
When correctly done, all the Xed squares will turn dark brown-black.
Solve the puzzle. 
Secret compartment: See the secret compartment open.
Read Kasumi's letter to her daughters. Take the sword.

Meet the yurei. You are under water. This is a timed puzzle.
Immediately, take the sword from inventory and cut the ropes on the marked areas.


Check the yurei. Look close at the arm and the head.

Clarify things:
Go upstairs and talk to everybody.
Takae: Go to room 18 and talk to Takae completely.


_______________________________________________________________________________

Part 15_Japanese numbers<<<==              ==>>>Part 17 FINAL                                 .

12.09.2010

Nancy Drew | Shadow at the Water's Edge | Part 15_Japanese numbers

Look for another set of nonogram numbers.
Pictures:    Check the text message and see more pictures sent by Yumi. You should have a total of 7 colored pictures sent by Yumi.
Nancy will make a comment about printing them all.
Process Yumi's pictures:   
Exit the ryokan and go to the pachinko parlor at Kure.
Enter the pachinko parlor. Look close at the shutterclunker booth.
The "take picture" side is out of order.
Click on slot at bottom right to automatically insert the cell phone.
Click on print photo at right side.
Do each photo individually: click on a picture and then click on print. Take photo from bottom slot. Do all the colored pictures.
Arrange the pictures:

Click on one of the developed picture in inventory and see all 7 laid out in squares.

Nancy Drew | Shadow at the Water's Edge | Part 14_Carved wooden bird

Talk to Yumi:    Go to Matsue and then to Bento shop. Talk to Yumi completely. You might need to change screen or go to the train station and come back.

Ryokan:    Go back to Misawa.
Talk to Miwako at the front desk.

Rentaro:    Go to the garden shed and talk to Rentaro completely.

Check the secret room:
Go back to room 39. Use the master key and enter. Use the star card on the side panels until you get to room 33.
As Savannah stated, click on the carved wooden bird on the left wall.
The closet right of the door opens. Go down the passageway into the other bath.
Look around. This is the room seen through the peephole.
Check the bricked entryway and the pool.
Look close at the table with the lantern. Read a faded note by Y to M. Stop it already or you'll be sorry.
Nonogram:    See a small altar on the left with Kasumi's portrait.
Look close at the latticed work above the altar. Automatically the paper found inside the bamboo is placed on the wall. You need another set of numbers.


______________________________________________________________________________________________________

Part 13_Room 33<<<==                                            ==>>>Part 15_Japanese numbers

12.08.2010

Nancy Drew | Shadow at the Water's Edge | Part 13_Room 33

Key cabinet: Look close at the metal cabinet at back wall.
Read the Krolmeister 3000 info paper on the clipboard to know more about the security system.
With the red card taken from the floor of room 18, we have all 5 cards needed.
Insert the cards from left to right: blue card, red, green, yellow and purple.
Then turn the knob below or above each card to position the shapes below it to that shown in the picture.
Take the only key in there. It opens rooms ending in 8/9.


Look for Savannah's room:

Since we can only open rooms ending with # 8 or 9, go to the second floor of the right wing. Use the key on room 39 at left side end of the hallway.

Enter and see a star lock on the panel close to the right closet.
Use the star key on that star lock. Look around room 37.
Use the star key on the star lock right of the closet. Be at room 35. Hear a weird sound.
Use the star key on the star lock right of the closet. Be at room 33. You are trapped.
Escape the room:
Immediately look close at the lock of the balcony door.
See that it is a crystal pieces lock. This is a timed puzzle.


There are 6 wedges in the circle. They are all similar. What you do on one of the wedge - also do it on the other 5.
Select a color from the right and fill the empty areas with the correct color.
There are pieces there already that show what should be placed on those areas.
You cannot save while in the puzzle but you can stop the time by opening the save feature. Good luck.
The lock turns. Click on the balcony screen to exit. Nancy jumps to the garden.


Go to bed and sleep.


Savannah: Call Savannah to see if she knows more about the room she stayed in.

She mentions a picture of a carved wooden bird that opens the secret passage.


______________________________________________________________________________________________________

Part 12 Computer Password<<<==                                                 ==>>>Part 14_Carved wooden bird